Transformations
The complete reference of media transformations supported by the TwicPics API.
There are two kinds of transformations: ones that actually modify the image (or video) and others that change the context of further transformations down the manipulation chain.
Syntax
All transformations follow the same structure: <name>=<parameters>
where:
<name>is the name of the transformation<parameters>is an expression specifying the parameters for the transformation
For instance:
resize=400will resize the image to 400 pixels in width while conserving the source image aspect ratioresize=640x480will resize the image to exactly 640 pixels in width per 480 pixels in height, potentially altering its aspect ratio
Fundamentals
Transformations can be chained together using the character /. There is no limit to the number of transformations you can chain, save for the limit in size of a URL as enforced by your browser. No matter how complex the manipulation, TwicPics will optimize it for speed and accuracy on the fly.
Focus point
Transformations behave differently depending on which point in the image is the main focus. TwicPics will do its best to keep this focus point as central as possible within the transformed image.
By default, the focus point is in the middle of the image but you can change its coordinates by using the focus transformation.
Chaining transformations
When adding a transformation to the chain, the parameters given are interpreted as if previous transformations had already been performed (ie. as if the source image was the result of the previous transformations).
For instance:
resize=340/resize=50pwill result in an image that is 170 pixel-wideresize=50p/focus=20x10will put the focus point at coordinates40x20of the source image
Since TwicPics will optimize the manipulation, be aware that a transformation may shadow what came before it. For instance resize=50p/resize=340 will result in an image that is 340 pixel-wide: TwicPics will simply ignore the first resize.
List of transformations
achromatopsia
Syntax:
Corrects the colors of the image for color-blind people suffering from achromatopsia.
The number provided must be between 0 and 1 and represents the degree of color blindness to correct for. If no number is provided then 1 (full-color blindness) is assumed.
| Examples | |
|---|---|
| none |  |
achromatopsia=0.5 | |
achromatopsia | |
background
Syntax: background=<color[+color]*>
background specifies a color, or a series of colors, that will show through transparent and translucent parts of the image.
The final background color will also fill the borders created by an inside transformation. This can be superseded by using the border transformation.
All types of color values are accepted (i.e., background=red, background=rgb(255,0,0), etc).
If multiple colors are specified and/or if multiple background transformations are specified, they are applied in order using alpha compositing. As a consequence, if, at one point, a color is opaque, any color and or background transformation thereafter will be ignored.
For instance, background=red.5+white will create a pinkish background and so will background=red.5+white+black and background=red.5+white/background=black: the final black color will be ignored because white is opaque.
Note that background, border and colorize are chainable, see how chaining works with colors for more information.
In addition to color values, the keyword remove can also be used. When remove is found, all previous background colors will be canceled and TwicPics will remove the image background using artificial intelligence. Following that, you have a translucent image and you're free to specify a new background color.
| Examples | |
|---|---|
| none |  |
background=remove | |
background=remove+cyan | |
background=remove
is still experimental and results are subject to change.
border
Syntax: border=<color>
border specifies a color to fill borders eventually created by an inside transformation. It supercedes background in that instance and it is notably possible to ensure both a solid background and translucent borders by using border=transparent. border will have no effect on images that have no inside applied to them.
If multiple border transformations are specified, they are applied in order. If a border uses an opaque color, any border thereafter will be ignored.
Note that background, border and colorize are chainable, see how chaining works with colors for more information.
colorize
Syntax:
- colorize=<color for black>[:<color for white>]
- colorize=<color scheme>
Replaces colors in the image to create a gradient, replacing pure black with the first given color and pure white with the second given color.
| Examples | |
|---|---|
| none | |
colorize=black | |
colorize=black:cyan | |
colorize=cyan:black | |
There are also two available color schemes for your convenience:
monochrometo create a black-and-white imagesepiato create a sepia effect
| Examples | |
|---|---|
colorize=monochrome | |
colorize=sepia | |
Note that background, border and colorize are chainable, see how chaining works with colors for more information.
contain
Syntax: contain=<size>
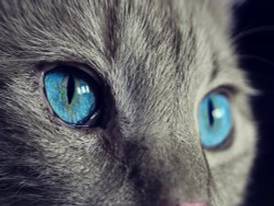
contain behaves like the CSS background-size "contain". It will resize the image so that it completely fits inside the target area while conserving the original aspect ratio. The resulting image will be smaller than a target size which aspect ratio is not the same as the aspect ratio of the input.
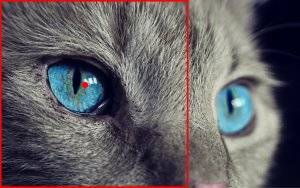
For instance, applying contain=150x100 to a 300x188 close-up of a cat will result in the following 150x94 image:

contain-max
Syntax: contain-max=<pixel size>
A conditional version of contain that will be applied only when one of the given lengths is smaller than the corresponding input image dimension.
contain-min
Syntax: contain-min=<pixel size>
A conditional version of contain that will be applied only when one of the given lengths is larger than the corresponding input image dimension.
cover
cover behaves like the CSS background-size "cover". It will resize the image so that it completely fills the target area while conserving the original aspect ratio. If some parts of the image end up outside of the covered area, they are cropped.
So, a cover=100x100 of a 300x188 image would first scale the image down to a height of 100 pixels and then crop along the x-axis as demonstrated below:
| Process | Result |
|---|---|
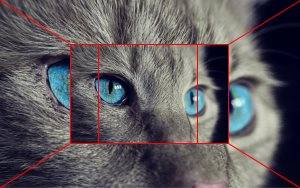 |  |
cover will use the focus point as a guide and will crop the image so that the focus point is as central as possible in the resulting image. For instance, focus=85x85/cover=100x100 will behave as follows:
| Process | Result |
|---|---|
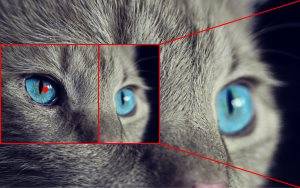 | |
When a ratio is provided, cover will extract the biggest possible area that satisfies the ratio and is as centered on the focus point as possible. For instance, focus=85x85/cover=1:1 will behave as follows:
| Process | Result |
|---|---|
 | |
cover-max
Syntax: cover-max=<pixel size>
A conditional version of cover that will be applied only when one of the given lengths is smaller than the corresponding input image dimension.
cover-min
Syntax: cover-min=<pixel size>
A conditional version of cover that will be applied only when one of the given lengths is larger than the corresponding input image dimension.
crop
Syntax: crop=<crop size>[@<coordinates>]
crop will extract a zone from the image which size is the given crop size. If no coordinates are given, the focus point will be used as a guide to determine where to start the extraction. If coordinates are given, they will be used to determine the top-left pixel from which to start the extraction and the focus point will be reset to the center of the resulting image.
| Examples | Process | Result |
|---|---|---|
crop=200x100 | 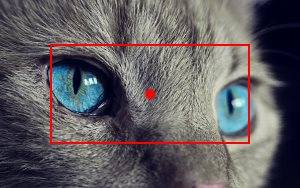 | 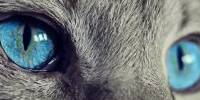 |
crop=200x100@20x50 | 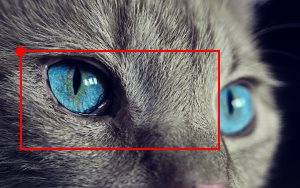 |  |
deuteranopia
Syntax:
Corrects the colors of the image for color blind people suffering from deuteranopia.
The number provided must be between 0 and 1 and represents the degree of color blindness to correct for. If no number is provided then 1 (full-color blindness) is assumed.
| Examples | |
|---|---|
| none | |
deuteranopia=0.5 | |
deuteranopia | |
download
Syntax:
- download
- download=<basename>
- download=<basename>.<extension>
Forces media to be downloaded rather than displayed in the browser when the URL containing the transformation is used as a link href or entered in the address bar.
When no parameter is given, filename will have a basename based on the type of media (image or video) and with an extension corresponding to the output format of the media (.mp4, .webp, etc).
For instance:
image.webpvideo.mp4
If only a basename is given, then the extension will still correspond to the output format of the media (.jpeg, .webm, etc).
| Examples | |
|---|---|
download=birds | birds.webm |
download=road | road.jpeg |
If both a basename and an extension are given they will constitute the full filename. Only use this option when you know the actual output format of the media in order to use the correct file extension.
duration
Syntax: duration=<number>
If the source media is a video, duration will extract the given duration from said source video.
Duration is a number of seconds that can be an integer as well as a real number (i.e., duration=2, duration=11.2, etc ).
By default, duration is applied from the start of the source video. For instance, duration=6 will effectively slice the video from the start up to second 6. You can change this behavior by using the from transformation.
You can find more information about duration and its use-cases in the video slicing chapter of our video optimization best practices.
flip
Syntax: flip=<axis>
flip will invert the image horizontally, vertically, or both, depending on the axis provided.
| Expression | Axis | |
|---|---|---|
both | horizontal and vertical |  |
x | horizontal | |
y | vertical | |
focus
Syntax:
- focus=<coordinates>
- focus=<anchor>
- focus=auto
focus will set the focus point coordinates. It doesn't modify the output image in any way but will change the behavior of further transformations that take the focus point into account (namely cover, crop and zoom).
If an anchor is provided, then the focus point will be the corresponding corner or the middle point of the corresponding border.
If auto is used in place of actual coordinates, the focus point will be chosen automagically for you! Note that auto is not implemented for videos yet.
from
Syntax: from=<number>
If the source media is a video, from will slice it from the given mark.
Mark is a position in seconds that can be an integer as well as a real number (i.e., from=1, from=5.75, etc).
By default, the video will be sliced up to the end of the source video. For instance, from=2 on a 10-second long source video will effectively slice the video from second 2 to second 10. You can change this behavior by using the duration transformation or the to transformation.
You can find more information about from and its use-cases in the video slicing chapter of our video optimization best practices.
inside
inside behaves like the CSS background-size "contain". It will resize the image so that it completely fits inside the target area. Contrary to the contain transformation, translucent borders will be added if the resulting aspect ratio is not the same as the aspect ratio of the input so that the resulting image has the exact, physical, size specified.
If the background transformation is used, then the background color will be used to fill the borders. If you wish to have a different color than the background color for the added borders, you can use the border transformation.
| Examples | |
|---|---|
inside=150x150 |  |
background=black/inside=150x150 |  |
background=black/border=cyan/inside=150x150 |  |
max
Syntax: max=<pixel size>
Alias of contain-max.
min
Syntax: min=<pixel size>
Alias of contain-min.
noop
Syntax: noop
Passes the media as is. TwicPics will not re-encode or apply any transformation be they provided through the API or through the path default manipulation.
output
Syntax:
- output=<format>
- output=<preview type>
- output=auto
Specifies the output format. It can be an image format, a video format or a preview format. Only the last output in the manipulation expression is taken into account. By default, TwicPics will "smart-guess" the best output format for the browser currently issuing the request, but you can use output to override this behavior.
Available image formats are:
aviffor AV1 Image File Formatheiffor High Efficiency Image File Formatimage(jpegorwebpdepending on the browser, useful to extract the first frame of a video)jpegfor Joint Photographic Experts Grouppngfor Portable Network Graphicswebpfor WebP
Available video formats are:
h264for an H.264 stream in an MPEG-4 Part 14 containerh265for an H.265 stream in an MPEG-4 Part 14 containervp9for a VP9 stream in a WebM container
Available preview types are:
blank: a blank, totally translucent version of the resulting imageblurhash: a small text-based representation of the image (see BlurHash)maincolor: a solid color image containing the most important color in the resulting imagemeancolor: a solid color image containing the mean color of the resulting imagepreview: a blurry preview of the resulting image
For videos and by default, previews are based on the first frame of the resulting video. You can use the from transformation to target a specific frame.
| Preview Formats | |
|---|---|
output=blank |  |
output=maincolor | |
output=meancolor | |
output=preview | |
| original image | |
Please note that blank, maincolor, meancolor and preview are distributed with a X-Robots-Tag: noindex header so that they are not indexed by search engines.
In addition, you can use output=auto to ensure TwicPics' "smart-guess" of the output format is used even if an output format has already been specified by the default manipulation of your path.
protanopia
Syntax:
Corrects the colors of the image for color-blind people suffering from protanopia.
The number provided must be between 0 and 1 and represents the degree of color blindness to correct for. If no number is provided then 1 (full-color blindness) is assumed.
| Examples | |
|---|---|
| none | |
protanopia=0.5 | |
protanopia | |
quality
Syntax: quality=<number>
Specifies the output quality as a number between 1 and 100.
Note that quality will be ignored when:
outputispngand truecolor is onoutputis a preview format
quality-max
Syntax: quality-max=<number>
A conditional version of quality that will be applied only when given quality is below current quality.
| Examples | Resulting quality |
|---|---|
quality=100/quality-max=50 | 50 |
quality=20/quality-max=50 | 20 |
quality-max=50/quality=100 | 100 |
quality-min
Syntax: quality-min=<number>
A conditional version of quality that will be applied only when given quality is above current quality.
| Examples | Resulting quality |
|---|---|
quality=100/quality-min=50 | 100 |
quality=20/quality-min=50 | 50 |
quality-min=50/quality=20 | 20 |
refit
Syntax: refit=<size|ratio>[@<anchor>][(padding)]
Alias of refit-cover.
refit-cover
Syntax: refit-cover=<size|ratio>[@<anchor>][(padding)]
refit-cover will resize the image to the specified size while maximizing the area occupied by the main object (or objects) found within said image.
| Example | |
|---|---|
| original image |  |
refit-cover=1:1 |  |
By default, the subject will be placed at the center of the resulting image but it is possible to align the subject with a given border by specifying an anchor.
| Examples | |
|---|---|
refit-cover=1:1@left | |
refit-cover=1:1@right | |
Also by default, the subject will touch the borders of the resulting image. This can be avoided by adding padding.
It is generally easier to use padding values in percentage so that the added breathing room is independent of previous scalings.
| Examples | |
|---|---|
refit-cover=1:1 | |
refit-cover=1:1(15p) | |
refit-cover=1:1(30p,0,5p) | |
If there is not enough pixels in the original image to satisfy a given padding, as many pixels as available will be used and it may create a padding region that is smaller than expected.
If there is not enough pixels on the opposing side of the anchor point then the same best-effort approach will be used and the subject may be farther from the anchor point than expected.
If placement is paramount to you, please use refit-inside instead.refit-inside
Syntax: refit-inside=<size|ratio>[@<anchor>][(padding)]
refit-inside will resize the image to the specified size while ensuring the main object (or objects) are perfectly centered, even if it means borders have to be created in the process.
| Example | |
|---|---|
| original image |  |
refit-inside=1:1 |  |
By default, the subject will be placed at the center of the resulting image, but it is possible to align the subject with a given border by specifying an anchor.
| Examples | |
|---|---|
refit-inside=1:1@left | |
refit-inside=1:1@right | |
Also by default, the subject will touch the borders of the resulting image. This can be avoided by adding padding.
It is generally easier to use padding values in percentage so that the added breathing room is independent of previous scalings.
| Examples | |
|---|---|
refit-inside=1:1 | |
refit-inside=1:1(15p) | |
refit-inside=1:1(30p,0,5p) | |
resize
resize will resize the image to the specified size. If only one length is provided, the other dimension will be determined so as to respect the aspect ratio of the input image. If both lengths are provided, the aspect ratio may not be respected.
| Examples | |
|---|---|
resize=150 |  |
resize=-x150 | 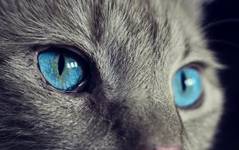 |
resize=150x150 | 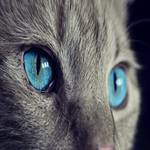 |
If a ratio is provided, the image will be resized so that it stays as close as possible to its current surface (i.e., number of pixels) while respecting the given aspect ratio as closely as possible.
For instance, resize=4:3 will result in the following 274x206 image:
The 300x188 image was resized to a 274x206 image (respecting the 4:3 ratio as best as possible). The initial surface was (300x188=) 56,400 pixels. The final surface is (274x206=) 56,444 pixels.
resize-max
Syntax: resize-max=<pixel size>
A conditional version of resize that will be applied only when one of the given lengths is smaller than the corresponding input image dimension.
resize-min
Syntax: resize-min=<pixel size>
A conditional version of resize that will be applied only when one of the given lengths is larger than the corresponding input image dimension.
to
Syntax: to=<number>
If the source media is a video, to will slice it up to the given mark.
Mark is a position in seconds that can be an integer as well as a real number (i.e., to=17, to=9.61, etc ).
By default, the video will be sliced from the very start of the source video. For instance, to=8 will effectively slice the video from the start up to second 8. You can change this behaviour by using the from transformation.
You can find more information about to and its use-cases in the video slicing chapter of our video optimization best practices.
tritanopia
Syntax:
Corrects the colors of the image for color-blind people suffering from protanopia.
The number provided must be between 0 and 1 and represents the degree of color blindness to correct for. If no number is provided then 1 (full-color blindness) is assumed.
| Examples | |
|---|---|
| none | |
tritanopia=0.5 | |
tritanopia | |
truecolor
Syntax:
- truecolor=<boolean>
- truecolor
truecolor can be used to prevent color quantization. If no boolean is provided, true is assumed. By default, quantization is allowed (truecolor=false).
When may quantization occur? Whenever the output format is png. By default, TwicPics will quantize colors to reduce the size of the output image. It is possible to prevent this behaviour by setting truecolor to true.
Be aware that TwicPics will automatically output PNG images when:
- no output format is specified,
- the source image has an alpha channel,
- and, target browser does not support WebP.
As such, use truecolor if you want to distribute substantially larger but more accurate images with translucency to users on browsers that do not support WebP.
turn
Syntax: turn=<angle>
turn will change the orientation of the image. It accepts an angle. Angles will be rounded to the closest multiple of 90°.
| Expression | Angle | |
|---|---|---|
turn=flip | 180° | |
turn=left | -90° | |
turn=right | 90° | |
zoom
Syntax: zoom=<number>
Zooms into the image by a factor equal or superior to 1 towards the focus point while preserving the image size.
| Examples | |
|---|---|
zoom=1 |  |
zoom=1.5 | |
zoom=2 | |
zoom=3 | |
